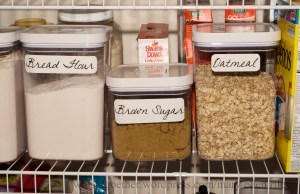
I decided to tackle my chaotic pantry. I was inspired by the gorgeous pantries on the internet such as this
and this
or this
 |
| At Whisk Together blog |
 |
| At Malka in The Pantry blog |
 |
| At Healthy Girl's Kitchen blog.
But, the reality of my kitchen is similar to this:
A 2' deep by 4' 8" wide, builder's grade kitchen island in a rental property which serves as my pantry. I have a few overflow items in a storage closet and spices in separate drawers. But, most of my food is stored in the island.
I had started to convert my storage to glass jars a few years back. I hate plastic. So, I had a mix of glass jars and store packaging inside my island pantry. There was not much order or system as to how I placed items in there. Many of the lesser used items got pushed in the back and haven't seen daylight in months.
I started by taking a section out, sorting through things, trashing a lot and deciding what to put in glass jars. I opted to use two types of jars. These Anchor Hocking Cracker jars:
and canning jars like this
and this
In the past, I used labels made from my Brother P-Touch label maker -- which I loved! My model is similar to this one. But I think the one I own has been discontinued.

Unfortunately, I ran into problems when I changed contents. I frequently peeled off labels and created new labels to match the contents. That was too labor and material intensive.
Then I found these little chalkboard label beauties at Staples.
Oh, I was overjoyed! I bought a pack and immediately tried them out on my glass jars. First, they only fit on the largest jars as is. For the medium and small jars, I had to cut the label in 1/2 to use. I didn't mind that as this would increase the number of labels I could use. But, I ran into a problem. The chalk writing doesn't stay on. It smears and eventually rubs off. How come my labels don't look pretty and neat AND stay on like in the pictures? Am I the only one who actually touches the labels when handling the jars?
This was frustrating. I read that there were chalk markers somewhere. But, where? I looked in Staples, Michael's, Walmart, Target, A.C. Moore. I could only found them on the internet. I wanted a solution NOW.
While looking for other pantry organizing tools, I stumbled upon this.
\
It's a clear, plastic pocket with strong adhesive on back. You can insert and remove labels in the pocket with ease.
The package says, "Works in hot, cold and humid conditions...Sticks to all materials: bins, baskets, boxes and freezer containers...Make your own inserts...Change the insert anytime!" This sounds perfect. There were several sizes. I picked up the smallest size which was 2 1/4" x 4".
This size pocket also fits a business card. It happened to be that I had these at home which I could use to make the insert labels.
Decisions, decisions. I had to decide what font to use to print the labels. I wanted something legible for these old eyes. But, I also wanted something a bit fancier than Arial. So, I settled with Goudy Stout font in 20 point size. I would post a picture of it here but my computer is acting stupid right now.
I love the results. I'm off to peel and stick the rest of my labels onto the jars and I'll post pictures separately. (That's the only way my pictures seem to post.) Please let me know what you think.
|


No comments:
Post a Comment